Free Crochet Bag Pattern: How to Make a Stylish Chunky Crochet Handbag
Meet Your New Favorite Free Crochet Bag Pattern
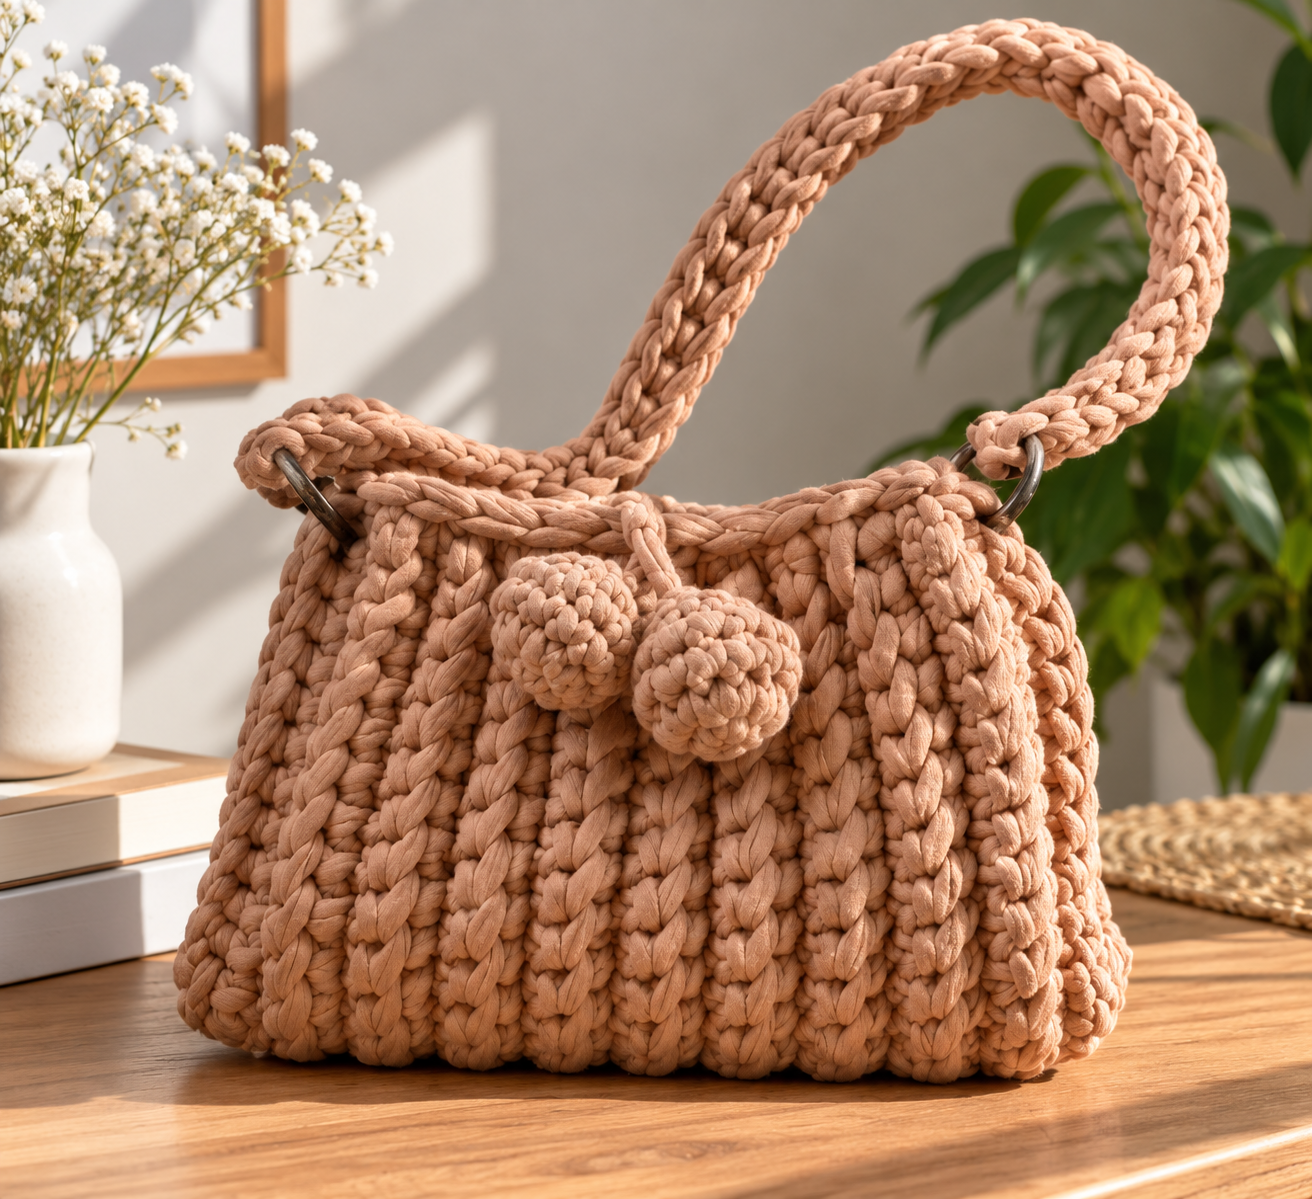
Looking for a beautiful and practical handmade accessory? This free crochet bag pattern is a great way to create your own stylish chunky crochet handbag. With its lovely textured stitches, comfortable handles, and charming bow details, this crochet bag is perfect for everyday use.
Whether you’re searching for an easy crochet bag pattern, exploring different crochet purse patterns, or looking for inspiration for your next handmade project, this design is a wonderful choice. Grab your favorite chunky yarn and crochet hook, and follow along with this step-by-step tutorial to make your own beautiful crochet bag!
Table of Contents
Materials
- I was crocheting the bag in two strands of yarn, so I used two skeins of cotton yarn. The yarn length is 104 m per 225 g. You can use another yarn suitable for a 9 mm hook.
- Hook 9 mm
- Scissors
- Darning needle for hiding the free ends
- Markers
Abbreviations:
ML – magic loop
Ch – chain
Sc – single crochet
Sl st – slip stitch
[…]* N – repeat N times
For detailed process watch the Video1
YouTube videos have clickable time codes below the description. Clicking on them takes you directly to the desired part of the video. To watch the knitting steps, click the general video link and then select the desired time code below.
Please note that we are working in a spiral, and there is no slip stitch at the end of the row or lifting chain.
I’ll repeat this information in the text:
Preparative row – on the left leave a free end 20 cm.
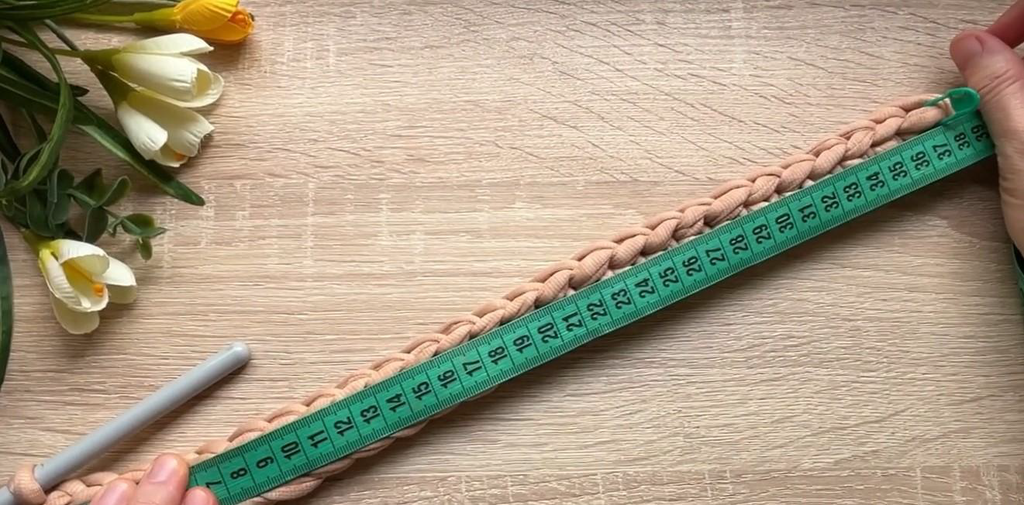
Cast on 27 Ch that makes 38 cm (26 ch + 1 lifting chain for the next row).
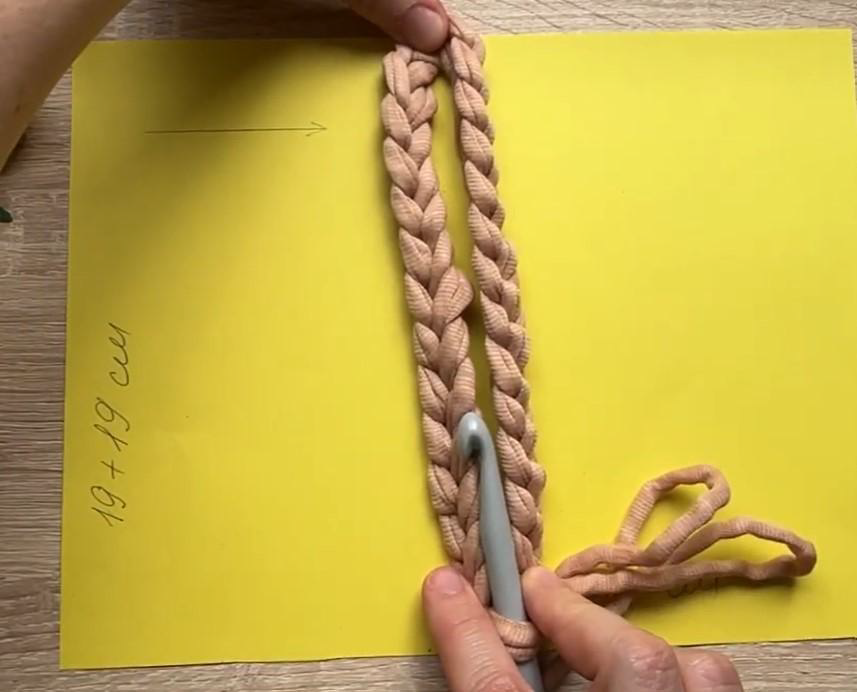
1 row – Make 26 Sc into the back half loop, starting with the 2nd stitch. After the 1st Sc don’t forget to replace the marker!
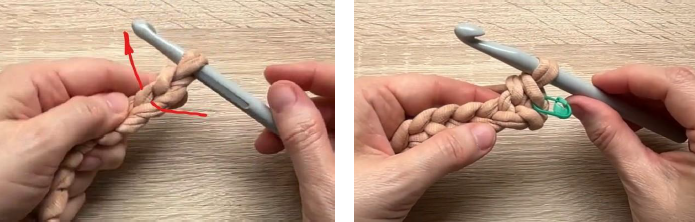
At the end of the row check the length of the piece 38 cm.
2 row – Make 1 lifting chain, turn the work and make 26 Sc into back half loops, starting with the second loop from the hook. After the 1st Sc don’t forget to replace the marker!
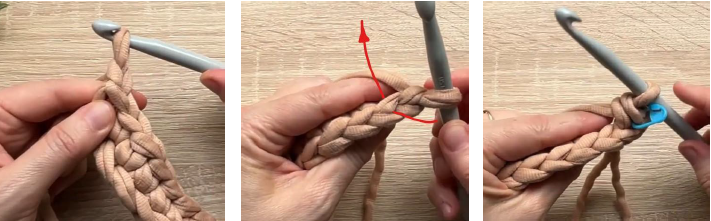
At the end of the row, make 26-th Sc into the stitch where the marker was in the previous row.
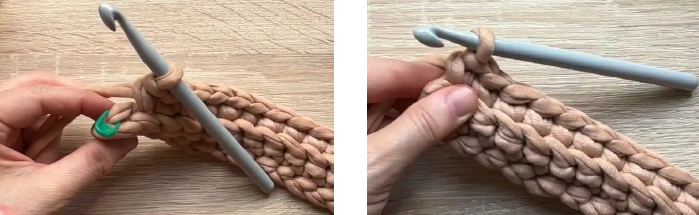
From the 3 rd to 20 th go on working like the 2nd row. Don’t forget to replace the marker at the beginning of each row! I made 20 rows — this makes 26cm.
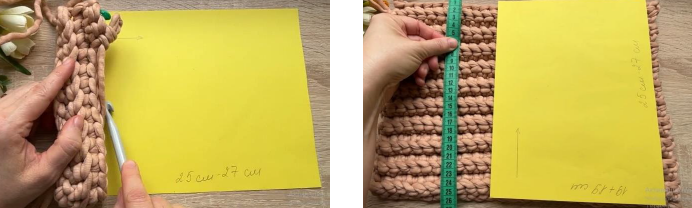
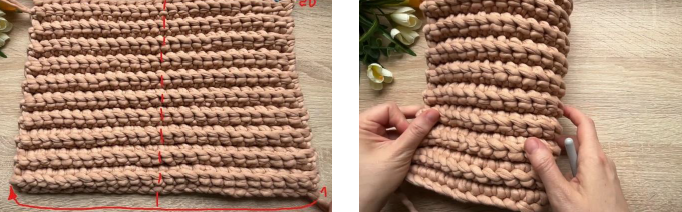
Place it so that the free end at the beginning of the knitting is in the lower right corner, and in the upper left corner is the working yarn, which we will continue working with. Fold the fabric in half, lifting the right side up. In the photo, the dotted line shows the fold point, and the arrow shows the direction of the fold.
Sew the first sides together. For this make 1 Ch, turn your work, so that the fold is on the left.
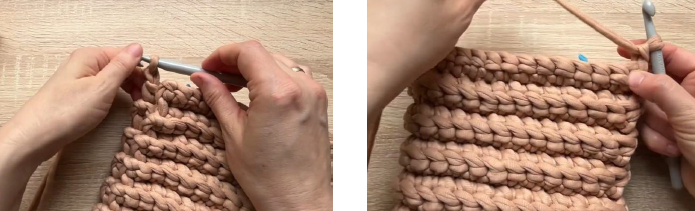
Insert the hook into the 2nd loop from the hook, into both half loops on one side, then into the corresponding loop on the other side (joining the edges). Crochet a sl st, pulling the yarn through all the loops on the hook.
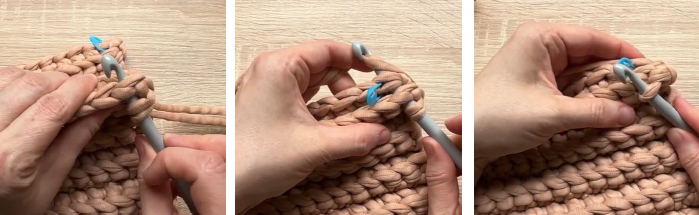
Then insert the hook in the next loop into both half loops on both sides and make a sl st.
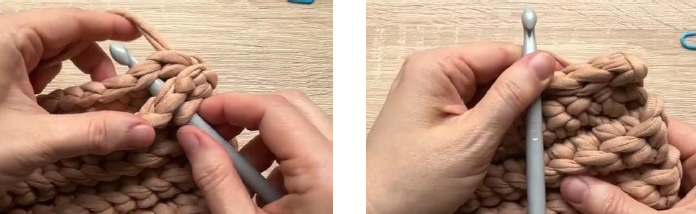
Repeat till the end, joining the sides of the bag, 13sl st in total.
Cut the working yarn and pull it through the loop on the hook. Bring the end of the yarn to the inside of the bag.
You don’t need to secure the ends of the yarn inside the bag—leave them hanging freely. The bag is reversible: it can be worn either right-side out (with the yarn tucked in) or wrong-side out, with decorative tassels.
If you like you can add some more strands to the fringe.
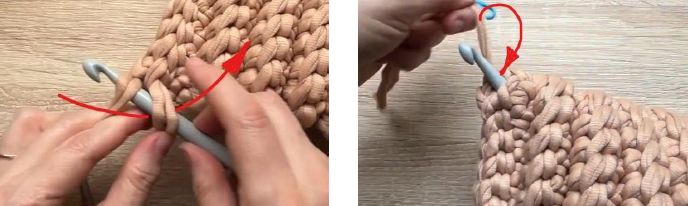
Sew the other two sides. Count 13 st top down and put the markers.
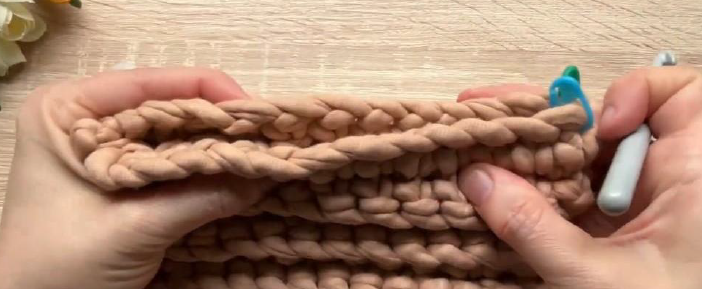
Here we start sewing from bottom to top up.
Take your working thread and make a sliding loop, leaving a 15 cm free end. Take the hook out of the loop.
Insert the hook into the stitches marked with markers on both sides, grab the loop and pull it through them.
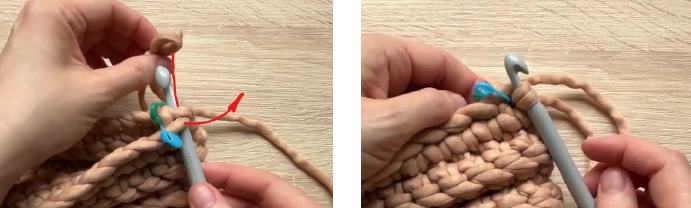
Then insert the hook into the next loops on both sides and make a sl st. Repeat till the end — in total13 Sl st, as on the other side.
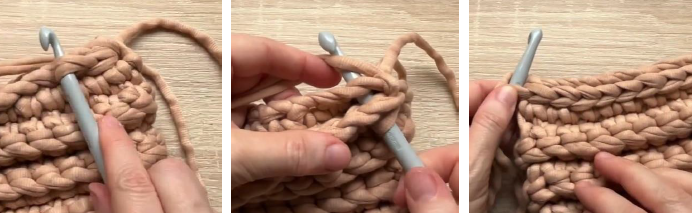
At the end make one more Sl st without inserting the hook into the stitch (that actually is a lifting chain for the next row).
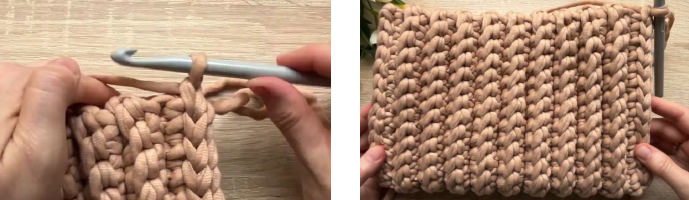
Trimming. For more detail see Video 2
The trimming is made with slip stitches. Insert the hook in the upper half loop on each rib and make a sl st into it.
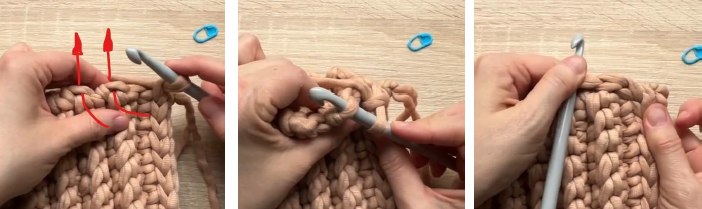
Make loose stitches do not tighten the st: the tighter your st will be, the narrower the upper part of the bag will be and wise a versa. Continue trimming. When you reach the side seam make sl st in the last st at very edge.
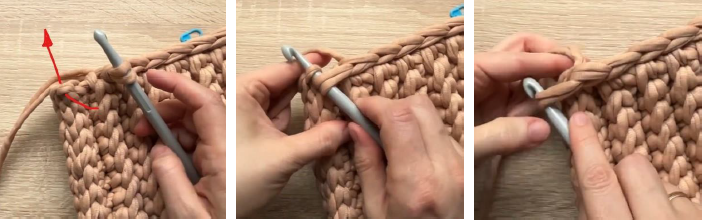
Turn your work, make a sl st into the corresponding edge stitch on the other side. Make this transition nice and seamless. Continue trimming as usual till the end of row.
Having made the trimminging till the beginning of the row, cut the thread and pull it through the last loop.
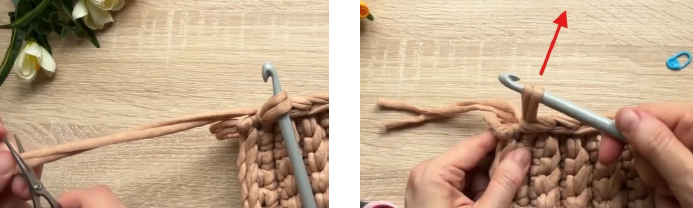
If the free end of the thread from the beginning of knitting is still on the front side, as in my video, bring it to the back side.
To create an invisible transition, insert the hook into both half loops of the first sl st at the beginning of the row and pull the thread out.
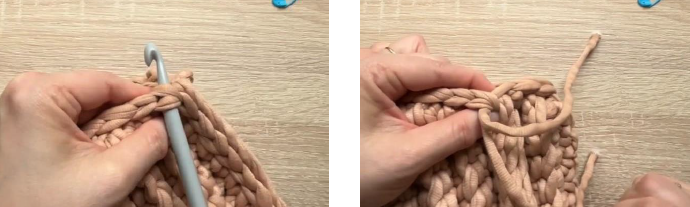
Then insert the hook into the center of the last loop where the yarn comes out and pull it through to the back side to create a false loop.
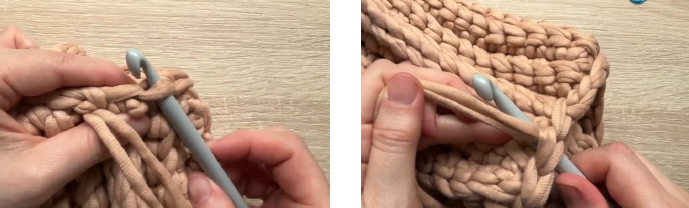
On the back side, secure the ends of the yarn with a knot. If desired, you can leave them loose—the bag can be worn on either the right or wrong side.
Handles. For more detail see Video 3
Row 1. Before starting, leave a long free end of yarn on the left—four times longer than the desired handle length (for a 1-meter handle, approximately four meters of yarn). If you want to change the handle length, multiply the desired length by four and leave this amount of yarn aside. In the ML, knit the first loop.
[Make yarn overs with the free end of the yarn, and knit stitches with the main working yarn.]
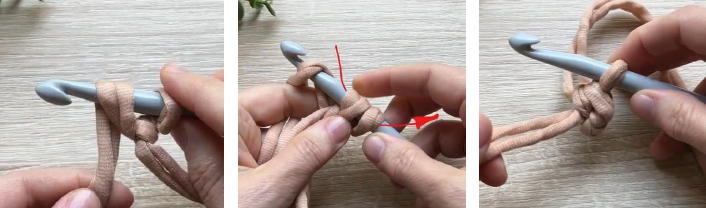
[…] Repeat till you achieve the length you need.
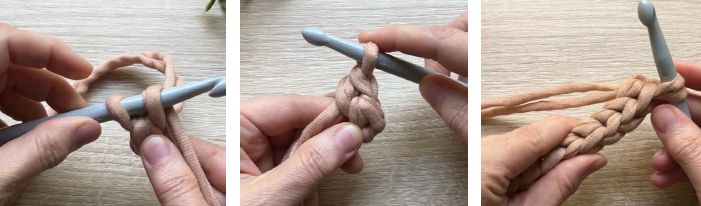
2-nd row. Make 1 lifting ch. Then turn the work toward you so that the wrong
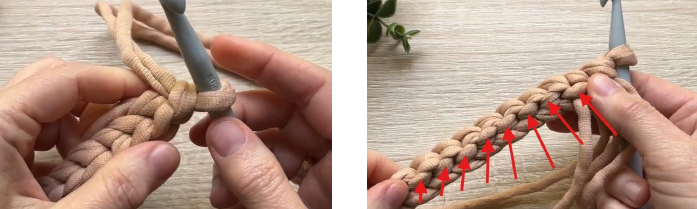
side of the ch braid is on top. We’ll be working into the half loops marked with arrows in the photo.
Insert the hook into the half loop, grab the working yarn, and pull it through all the loops on the hook—work a sl st. Go on working like this till the end of the row.
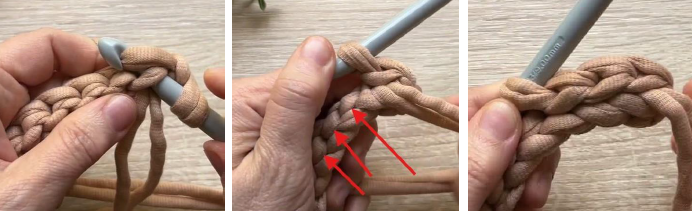
Make the last sl st into the edge st. Cut the thread and pull it through the loop on the hook.
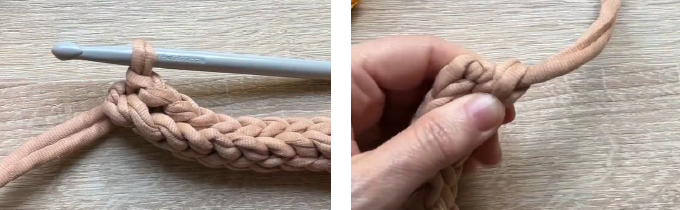
Now hide the ends. As the handle is worked in two strands it is easier to do this with smaller hook pulling each strand separately.
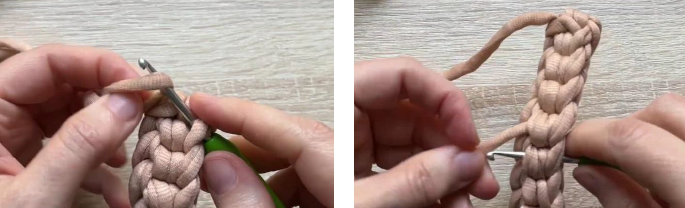
Cut the ends and fix them with textile glue.
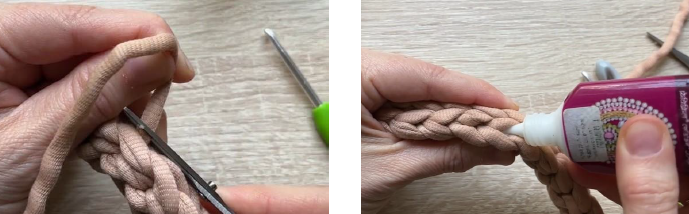
Likewise make the other end of the handle.
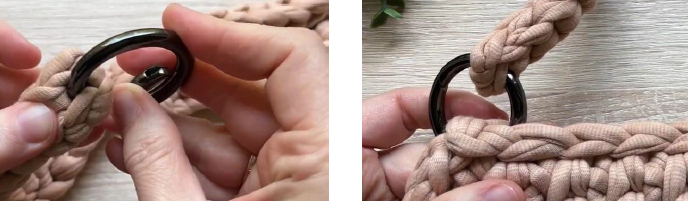
Attach the clasp ring to the handle and to the bag on both sides.
Congratulations on completing your beautiful handmade bag! This free crochet bag pattern is a wonderful way to create a stylish and practical accessory using your favorite yarn and colors. Whether you were looking for an easy crochet bag pattern, a beautiful crochet tote bag pattern, or inspiration from different free crochet bag patterns, we hope this tutorial helped you create something special.
If you enjoyed making this crochet bag, don’t forget to save this pattern and share it with other crochet lovers. You can also explore more crochet bag patterns free and free crochet tote bag patterns to discover your next handmade project.
Happy crocheting, and enjoy your new handmade bag!